Build Your Very Own Nitrous Kit
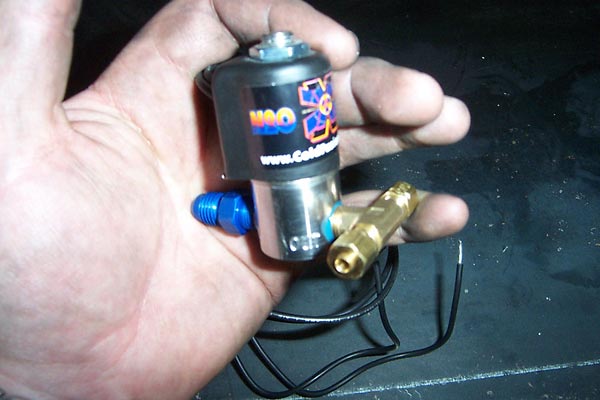
For almost any car, you will need the following items... They are available cheaply in your own locality from various suppliers with the possible exception of the solenoids valves themselves. Or available on the internet or on my forum. You may need to modify some simple air solenoids as shown on the solenoids page. Its easy enough and much cheaper than buying often inferior purpose built nitrous solenoids. As long as you understand the parameters! Nitrous Solenoids
1. A bottle or "tank" to store Nitrous Oxide
Specification: Any Vessel that can safely store Liquid Nitrous Oxide, meaning a Bottle/Tank with a 3600 approx test pressure or higher used with a Bottle valve that has a pressure relief valve rated LOWER than this test pressure at about 1500 to 2000 psi. It does not HAVE to be a conventional bottle. (For example if you wish to "cheat" you could fill part of a motorcycle frame, Rear swinging arm, or under a cars bonnet maybe the "strut brace" could be used for secret storage) See link above. C02 bottle valves already have a safety blow off valve. NEVER USE ANY OTHER TYPE OF BOTTLE! Dry powder bottles for example will explode and kill you. Know what you are doing and read this about 6 times!
Ideals: Aluminium alloy, polished, or anodised, or painted in two pack epoxy spray paints and mounted using machined billet bracket, and/or Velcro straps for attractive and professional appearance. CO2 Fire extinguisher bottles are ideal. Or a Pub CO2 bottle.
2. A valve for this bottle
Specification: A full flow, (internal bore 2.5 to 4mm) Bottle valve, usually as used for a C02bottle. It must use a Siphon tube internally that fits into the underside of the valve to draw liquid Nitrous Oxide from the bottom of the bottle / tank. This Valve MUST have (for safety reasons) an Over Pressure rupture disk, as fitted to all C02 bottle valves that you can buy. Try home brew suppliers, welding supplies, pubs, fire extinguisher reconditioners etc for supply of these.
Ideals: Small attractive, chromed or Aluminium alloy Valves preferred for a professional appearance. Brass ones are common work fine but don't look pretty!
3. A special fitting that fits this bottle valve and converts to a normal 1/8th BSP thread(British standard pipe thread)
Specification: A specialised fitting that follows the 2.5 to 4mm internal bore of the siphon tube/valve and fits the unique Carbon Di-Oxide (CO2) Valve thread that all these bottle valves use. This reduces the thread size from the valves big CO2 thread down to 1/8th BSP so we can then attach the Nitrous Line to the bottle Try home brew suppliers, welding supplies, pubs, fire extinguisher reconditioners etc for supply of these.
Ideals: Most of the ones we find or can get easily are brass which goes dull! But, this can be Chromed, for the sake of appearances as required..
Intermission and warning!
This is a semi complete "nitrous system" comprising of a CO2 Fire extinguisher bottle (polished up) , a couple of plumbers "threaded reducers" in the top bottle thread, and an 1/8th inch "ball" 1/4 turn valve plumbers valve.
It works but don't try this! This bottle shown isn't safe since its valve does not include a blow off or rupture disk! In the event of over pressure due to overfilling or heat the bottle will explode violently! A bottle explosion can easily kill. Always use a proper valve with blow off or over pressure rupture disk for safety! Use a proper CO2 valve! I didn't because it looks neat and I am stupid, and only half filled the bottle very carefully BY WEIGHT and used it straight away. But its still dangerous! I show this only to show how easy it is to get things wrong and NOT know its a danger.
Its connected in turn to a length of stainless steel braided "brake" hose, modified air solenoid to work at 1000 psi plus. And a flexible nylon 4mm tube and fittings to feed the Nitrous Oxide gas to the engine, with home made "injector" all shown above.
Not shown is the fuel solenoid/pipes/injector... All look similar though.
4. A braided Stainless steel Nitrous Pipe to feed the Solenoid in the engine bay
Specification: Recommended for all bikes and race vehicles - Normal Braided line. The same stuff countless racers, and motorcyclists use to swap onto their vehicles to replace the Rubber brake pipes! Its actually a P.T.F.E. (a sort of plastic) sleeve inside a woven stainless steel sheath. It has a 3.7mm internal bore. It can be expensive, if bought "branded (Goodridge, or Aeroquip for Example) or cheap if unbranded and bought off a roll by the meter. Its all the same for our purposes. You will also need some fittings that are easy to screw onto the ends that go from "braided" to 1/8th BSP. These fittings have a minimum 2.30 mm internal bore.
Alternatively, and for cheapness, with some advantages for small power boosts only, and on some road cars, 4mm Nylon, but you will need the stuff with 1.7mm internal bore preferably. And suitable fittings with nuts and olives. (not the more common 2.5mm bore stuff - its not really up to the pressure! and may burst and waste your Nitrous on a really hot day...
Ideals: Stainless Braided pipe! With stainless steel fittings on anything with 40 to 70 BHP extra added or above, and on all bikes. It looks more professional too.
The argument for and against 4mm Nylon for feeding Nitrous from the bottle is quite involved but... Its here should you be interested. Facts only. No "opinions"!
5. A Nitrous Solenoid!
Specification: Needs to operate reliably, against up to 1500psi pressure of liquid Nitrous Oxide gas at only 10 volts DC as this is sometimes all that's available due to current drain on small light batteries on race vehicles without charging systems. It must also flow enough Nitrous for the intended power increase. The solenoids I modify are actually intended for compressed air, and after modification will flow +140bhp worth of Nitrous Oxide. It must not "freeze" open, or leak, and must operate reliably over thousands of operations. Needs to be corrosion and vibration "safe" and not leak gas slowly over time.
Ideals: Should be low current drain, light small physically, easy to mount, have 1/8th BSP threads on inlet and outlet. Stainless steel, or anodised aluminium bodies look the nicest and do not corrode. Magnet wiring and connections should be waterproof. Nitrous Solenoids

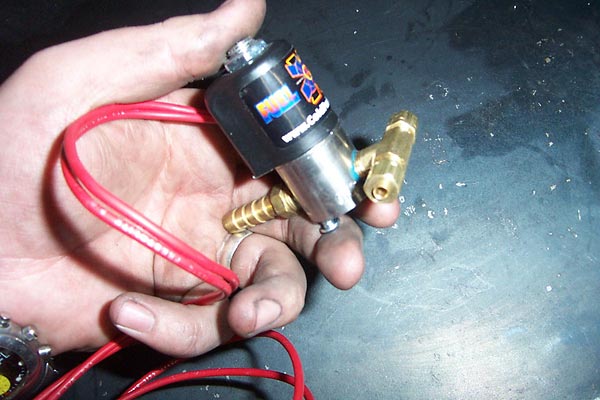
6. A Fuel Solenoid!
Specification: Needs to operate reliably, against up to 100 psi pressure of liquid fuel @ only 10 volts DC as this is sometimes all that's available due to current drain on small light batteries on race vehicles without charging systems. It must also flow enough Fuel for the intended power increase. The solenoids I use here are actually intended for compressed air. There are many suitable ones, but the seat sealing material must be tested to make sure it does not harden, soften, deteriorate, dissolve in everything from pump fuels, to methanol, and various octane boosters. It must not "freeze" open, or leak, and must operate reliably over thousands of operations. Needs to be corrosion and vibration "safe" Fuel Solenoids
Ideals: Should be low current drain, light small physically, easy to mount, have 1/8th BSP threads on inlet and outlet. Stainless steel, or anodised aluminium bodies look the nicest and do not corrode. Magnet wiring and connections should be waterproof.

7. A Tee piece or other means of supplying fuel to the Fuel Solenoid - depends on vehicle
Specification: Any type of tee piece can be used. Some means of tapping into the fuel pressure side of the Carb(s), or Fuel rail. It must be along with its fittings and hose clamps capable of the flow and pressure required for safety reasons.
Ideals: Stainless braided on fuel injected cars/bikes is safest, used with threaded tee or adapters. This is not always easily done, so a normal hose clamp/rubber pipe and barbed tee must be used. Do this VERY CAREFULLY because if it leaks a serious fire could result.

8. A Jet Holder for the Nitrous jet. (1/8th BSP to 4mm O/D Nylon with nut and olive)
Specification: Simple metal fitting. Male 1/8th BSP to 4mm nylon pipe - Compression style. Best not to use "push lock" fittings here. The 1/8th BSP side needs to be drilled and tapped M5 and recessed to accept a control jet.
Ideals: Brass, Brass plated with nickel, Brass chromed, or Stainless steel. Plastic is ok and works but a bit weak... Plastic does have lower thermal mass which is good!
9. A Jet Holder for the Fuel Jet. (1/8th BSP to 4mm O/D Nylon with nut and olive)
Specification: Simple metal fitting. Exactly the same as the one above. - Male 1/8th BSP to 4mm nylon pipe - Compression style. Best not to use "push lock" fittings here. The 1/8th BSP side needs to be drilled and tapped M5 and recessed to accept a control jet.
Ideals: Brass, Brass plated with nickel, Brass chromed, or Stainless steel.
10. Some 4mm O/D Nylon pipe to connect the solenoids to the point of injection
Specification: 4mm outside diameter. 2.5 internal bore. Available cheaply in big rolls... In many colours. The normal stuff has approx 2.4 to 2.5mm inside diameter. It is NOT rated for 1000psi pressures, so is not really suitable for the connection between bottle and solenoids, but it WILL actually stand it OK Mostly... It is however IDEAL for connecting the solenoids outlet to the engine, injectors, or distribution blocks. These are at much lower pressure because the control jet is in the solenoids outlet, and the pipes are "open" at the engine end. And more importantly they have low thermal mass.
Ideals: Pretty colours! Low thermal mass and cheap!
11. Nitrous/Fuel Injector - or occasionally more than 1 depending on engine configuration
Specification: It must introduce the Nitrous into the engine, and preferably the fuel as well. It can be two single connections close together, or a single device that allows both fuel and Nitrous to enter at the same point. In ALL cases the Nitrous MUST "collect" the fuel and atomise it finely inside the port, or air intake system.
Ideals: Must look pretty, be small, and preferably use nuts and olives in preference to "push lock" type fittings for reliability.
12. Assorted brackets and mounting hardware, cable ties, grommets, wiring etc
Specification: Difficult. Every vehicle and setup will be different. Fabricate as required...
Ideals: Solid, tidy, neat, well thought out.

13. An arming switch
Specification: Any switch that looks cool, sits in your cars dashboard, or somewhere within easy reach on a bike, that allows you to switch "on" or arm the system ready for use. It must be reliable, and be able to cope with 5 amps+ and preferably have some kind of light or other indicator so you don't forget its on! It should be wired through the ignition, so it only works while the engine is running. It should preferably only work when you have oil pressure (engine turning) and it would be advantageous if it was wired via the oil pressure switch.
Ideals: Use a "standard" interior switch in your car that uses the unused switch positions on your dashboard. This way it looks standard, not obvious?
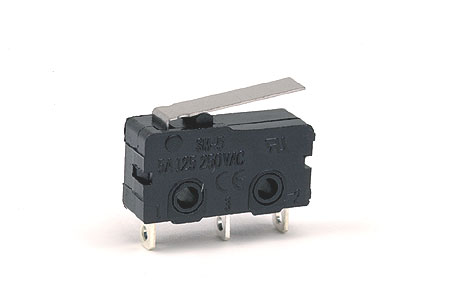
14. Throttle operated Micro-Switch or other alternative
Specification: Use a GOOD QUALITY 5 amp micro switch, and seal against water with silicon sealant or similar. Mount inside the car so the throttle pedal operates it at full throttle, or on the carb / throttle body instead. This means you only get nitrous at full throttle!
Ideals: Reliable!


Aint dat easy..........but could be followed!!
ReplyDelete